FPV robot with Raspberry Pi
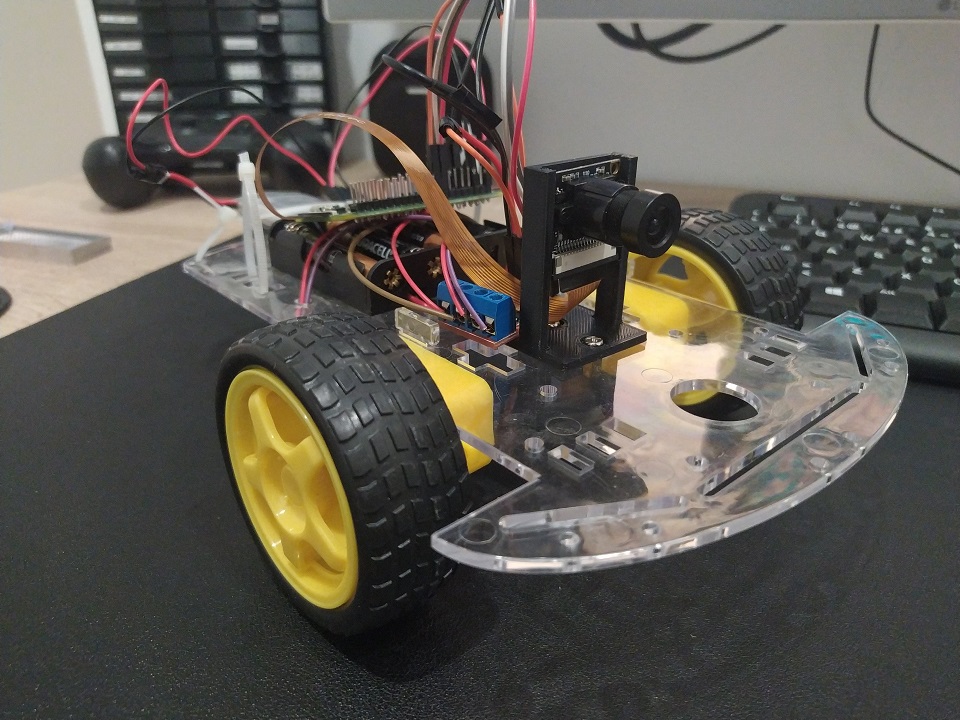
Not so long ago I bought one of those Amazon 2WD robot kits with a frame and 2 motors. These motors work straightforward with the Raspberry Pi’s Motor API provided that you have a motor control Bridge like this one interfacing with them.
So I thought well, just add a camera and you have yourself and online FPV robot.

Parts
- 2WD Robot frame
- L9110 Dual-Channel H-Bridge
- Raspberry Pi Zero (Raspbian Lite in an SD card)
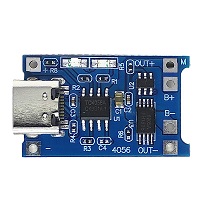
- TP4056 boost circuit for USB charging: model 03962A
- LiPo battery 1200mAh
- Raspberry Camera module any will do as long is compatible
- FFC camera cable for Pi Zero Pi zero has a slightly smaller camera port so I had to buy this
- 4 AA Batteries. The Motors need more power than the Pi so battery pack will be needed
Interfacing with the motors
I found a way to connect the motors and and very nice example on how to interface with them in the official Raspberry project page, here.. Also, it show me how the H bridge provides power and direction to the motors.
WebSockets Server
Now with that example in python. I wanted to try a server with Websockets to take adventage of the speed of a connection that is always open.
I took the example and created an event that can be triggered by a message from our client app (we will cover it later) and accepts values for each motor, being 1 full power for the motor and -1 full backwards. With that you can get all 5 possible movements.
from flask import Flask, escape, request, render_template, send_from_directory
from flask_socketio import SocketIO
from gpiozero import Motor
import time

motor1 = Motor(27, 17) # Here depending on your configuration. I use these GPIO any would do
motor2 = Motor(24, 23)

app = Flask(__name__)
app.config['SECRET_KEY'] = 'secret!'
socketio = SocketIO(app, cors_allowed_origins='*')

@socketio.on('move_motors')
def handle_message(data):
    left = data['data']['left']
    right = data['data']['right']

    print('left: ' + str(left))
    print('right: ' + str(right))

    if left > 0:
        motor1.forward(left)
    elif left < 0:
        motor1.backward(abs(left))
    else:
        motor1.stop()

    if right > 0:
        motor2.forward(right)
    elif right < 0:
        motor2.backward(abs(right))
    else:
        motor2.stop()

if __name__ == '__main__':
    socketio.run(app, host='0.0.0.0', port=49152)
    #running in localhost:5000 default
I ran this as a server for controlling the motors. SocketIO is one of the defacto libraries for interfacing with WebSockets. Very easy to use and has also a port to use it in python. I basically followed the guide in the official website to get things up an running.
USB Charging
The little module TP4056 boost circuit can charge a LiPo battery or serve as the power input for the py or both, withouth worrying about harming the LiPo. The cir circuits prevents overcharge and overdischarge. The module itself is pretty self exaplinatory. It has + and - for battery and + and - for load, the latter we connect to the Pi on pins 2 (5V) and 6 (GND).

3D printed camera stand
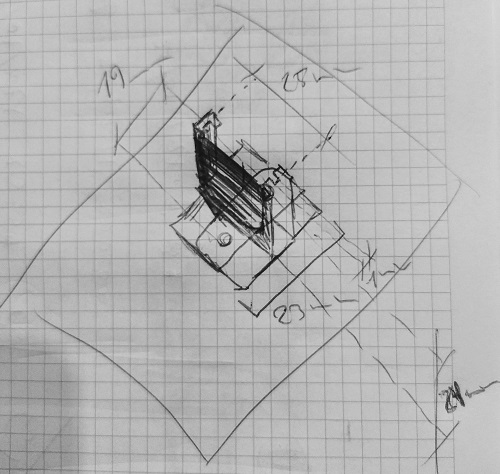
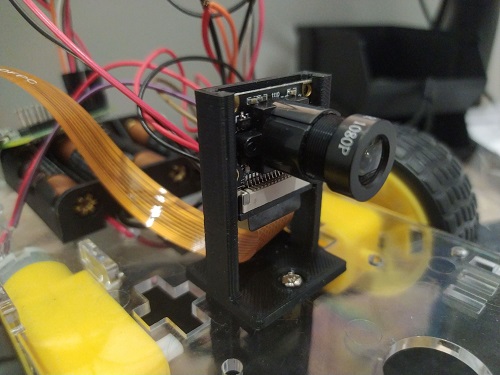
The camera module did not come with any support or case or anything, and although the size is pretty similar to the official raspberry camera module, I wanted to give it a go, design and print a simple stand for my tests. I sketched up a very simple support that I could screw into the plastic frame. You can find it here in thingiverse


Video stream
One of the main parts it’s the video feed. There were a few options out there. The simplest one were using single frames and feeding a video html tag. Those test prove to be very slow o nthe Pi giving me framerates of 15FPS or less on the Pi Zero. The whole idea is that the I could have a latency that could allow me to control the robot from outside my network. An acceptable amount of latency.
I also want it to give it a shoot to WebRTC the new thing in browser coms. I tried first a WebRTC module for uv4l. It worked but it was kind of unstable, probably misconfiguration of some sort. Then I realised the project was not open source, so I couldn’t look inside. I then found RWS which had super low latency and worked out of the box, almost no config.
Motor control JS client
RWS also comes with an embedded web server where I could modify the index demo file with the motor control client we needed to connect to Flask Socket IO server we just discuss. This was also fairly simple. Include SocketIO javascript library, and write a javascript script that detects key presses and sends them to the Flask server where they get transfer to the Motor.
<script type="text/javascript" charset="utf-8">
    var socket = io('ws://your-flask-socket-io-server:49152');
    socket.on('connect', async function() {
        forward = {left: 1, right: 1}
        backwards = {left: -1, right: -1}
        left = {left: 1, right: -1}
        right = {left: -1, right: 1}
        stop_motors = {left: 0, right: 0}

        document.addEventListener('keydown', (event) => {
            if (event.repeat) return;
            const keyName = event.key;
            if (keyName === 'w') {
                console.log('going forward');
                socket.emit('move_motors', {data: forward});
            } else if (keyName === 's') {
                console.log('going backwards');
                socket.emit('move_motors', {data: backwards});
            } else if (keyName === 'a') {
                console.log('going left');
                socket.emit('move_motors', {data: left});
            } else if (keyName === 'd') {
                console.log('going right');
                socket.emit('move_motors', {data: right});
            }
        });

        document.addEventListener('keyup', (event) => {
            const keyName = event.key;
            console.log('keyup event\n\n' + 'key: ' + keyName);
            socket.emit('move_motors', {data: stop_motors});
        });
    });
</script>
Notice that the emit points to the channel we defined before. The default page for the video feed is already super nice so no more changes needed for this experiment.
External Access
Now to be able to access everything from the outside world ports needed to be open and redirected.
WARNING: Everything exposed in here is not secured and opening ports in your router could be dangerous
Since I have a dynamic IP I had to use a dynamic dns provider (I used NoIP) to make it easily accesible from the outside The ports I needed to redirect were 8889 (webRTC RWS server) and 49152 (flask motor control over websocket)
Installation Steps!
1. Activate Camera Interface
First we need to activate the camera module. We can do it graphically with the config wizard.
sudo raspi-config
Hit Interface Option then Camara and YES
2. Downalod and install RWS somewhere accessible
I have a Pi Zero but in the url you can find other builds
wget https://github.com/kclyu/rpi-webrtc-streamer-deb/raw/master/rws_0.74.1_RaspZeroW_armhf.deb
3. Update system, install dependencies and the RWS websocket video server
sudo apt update
sudo apt full-upgrade
sudo apt install libavahi-client3
sudo apt install python-rpi.gpio python3-rpi.gpio
sudo dpkg -i rws_0.74.1_RaspZeroW_armhf.deb
4. Tweaking the default webserver page
We change it to connect without https and also add the connection to connect to the Flask SocketIO server that controls the robot.
[insert the changes in here]
In the repo I have the flask server code I also put a modified copy of the rws index page.
cd /opt/rws/web-root #the folder np2 contains the client
sudo cp -r ~/rpi-car/statics/rws-modded-default/. .
restart the video service:
sudo systemctl restart rws
Changes should now be visible in http://your-private-ip-address:8889/np2/ and you should be able to see the video feed.
5. Install socketio for python and eventlet to support concurrency
pip3 install python-socketio
pip3 install eventlet
6. Run motor control server
From the rpi-car folder run the flask server with python3
python3 flask-server.py &
7. Open ports in router
Open ports 8889 and 49152 and redirect to the Pi Zero address to make them accessible from the outside: be careful, nothing is secured with SSL, so its not safe. Use it, test it, and then find a way to secure it.
At this point and if you also configured a Dynamic dns service you should be able to accessthis ports with the dyn dns URL.
How does it look?!
Here’s a quick demo were you can more and less the latency and the control.
Next steps!
This is only a tiny proof of concept, there’s so many ideas to improve it, but I’d like to start with a few:
- Instead o ahving to ports and channels, put data and image in the same WebRTC channel
- A 3d printed case to hide everything a make it look nicer.
- Add a couple of servos to pan an tilt the camera.
- Plug a mic and a speaker to have two way audio coms!